Saturday, August 25, 2012

pregnancy week 36

It's getting very close! 

-Four weeks until his estimated birthday. 
-My uterus is measuring slightly ahead at 37 weeks. 
-His heart rate was 158 at my appointment. 
-As of right now, he is head down, but not "in position" yet.
-I'm pretty sure I am carrying baby hulk. He's bruised me quite a bit from his kicks and rolls.

I decided I should probably go ahead and get at least his hospital bag ready. I'll make a post about that once it's finished. We're all anxious as to if he'll come on or before his due date, or be stubborn like his brother. 


egg in hole grilled cheese

Um, I think grilled cheese sandwiches just got even better. Just sayin'. I'm posting ingredients for just one sandwich, so x2 for each additional sandwich.

Ingredients:
2 slices of bread
1 egg
1 slice of cheese
butter
salt
pepper

Preheat a skillet over medium heat (or a griddle set around 250F). Butter both sides of the bread. In one slice, use a circle cookie cutter and cut a hole out of the middle. Save the circle of bread. Place all bread in skillet (or griddle) and crack the egg into the hole in the bread. Salt and pepper to taste. Cook until the egg is white on the bottom. Flip it over (all bread). Add a slice of cheese to the bread with the egg. Cook it until your desired likeness of the egg. If you like the yolk runnier, about 2 minutes. If you like the yolk cooked a little more thorough, about 3-4 minutes. Put the naked piece of bread on top of the egg/cheese bread. NOM NOM NOM! It's really delicious. The picture doesn't do it justice.


Saturday, August 18, 2012

pregnancy week 35

The only new news is that this kid is being a pain in the butt and decided to flip into the breech position. He's been head down since 16 weeks. Of course he would flip breech now. A little less than 5 weeks to go, so I hope he flips again!

We went to the beach for some competition for Chris's company. We got a few belly shots. Here is my 35 week shot.


homemade play dough

I'm cheap. I hate buying things at the store like play dough, which will probably get played with twice and then dry out. I can thank the Pinterest Gods again for showing me many homemade play dough recipes. This is the one that worked best for us. I found the tutorial (with step by step pictures) over here. It was easy, I had all the ingredients in my pantry already and it has kept my toddler and the little girl I am babysitting busy for a while. I guess I can also add my BIG child (aka my husband) in on that list. He's currently building play dough cars as I type this!

Ingredients:
1 cup of flour
1 cup of water
1/4 cup of salt
1 tablespoon of vegetable oil
2 teaspoons of cream of tartar
food coloring

Throw all of the ingredients into a medium sized sauce pan. Doesn't matter what order, but I put the food coloring in last. I suggest a wooden spoon. It's easier to work with. Mix everything until almost all the clumps are out. Heat it up over medium heat while continually stirring. It will eventually clump up into a ball of dough (as you are stirring!). This took maybe 4-5 minutes. Take your dough blob and sit it on the counter. It's a little hot, so carefully knead it with your hands to make that play dough consistency. Now it's time to break out the rolling pin and cookie cutters and let the kids go at it!

Finished blob 

And here is my little man cutting sharks out of his portion of the dough

This is probably better than the play dough I've bought from the store. Once you are finished playing, store in an airtight container and it's good for about 6 months (says the original link)!


Wednesday, August 15, 2012

mozzarella stuffed meatballs

I saw these on Pinterest and I knew I had to make them. Who doesn't love meatballs? Add in mozzarella and it's a little piece of Heaven. I served these on top of white rice with brown gravy. Yum! The blog I was directed to didn't have any ingredient list, so I used the one I normally use, but added in the mozzarella. 

Ingredients:
1 lb ground beef
1/4 teaspoon salt
1/8 teaspoon pepper
1/2 teaspoon garlic salt
1 teaspoon oregano
2 tablespoons parsley
1/4 cup grated parmesan cheese
1 tablespoon bread crumbs (I used Italian flavored)
1 egg
mozzarella cheese, cubed
EVOO

Preheat oven to 350F.  In a large bowl, mix together the first 9 ingredients. Generously coat the bottom of a glass baking dish with EVOO. I used about 2 tablespoons. Separate your meat mixture into 9 equal globs. You can make them smaller if you'd like, but will have to adjust baking time. Smash a glob to a semi-flat status in your hand. I know, my cooking lingo is awesome. Place a cube of mozzarella in the center and then shape the meat into a ball around it. Continue with all 9 globs. Put your stuffed meatballs in the EVOO drenched baking dish and pop that bad boy in the oven for about 35 minutes. Mine came out perfectly cooked. Look at these. DROOL. See the mozzarella oozing out?


Tuesday, August 14, 2012

teriyaki pork chops

It has been a loooong while since I have posted any new recipes. I know I've mentioned in a few posts some of the reasons why I have not been posting them, but I've decided that enough people have messaged me on Facebook asking for more ideas that I will start back. 

So, you all know I love my crock pot, right? Lol. I've been reading up on freezer meals lately. Seems like a good idea since I will have a newborn and be losing my husband to the sandbox around the same time. I wanted to try some of them out first before I freeze them, just to be sure I'll actually like it. Tonight we did teriyaki pork chops. I will definitely be using this as a freezer meal!

Ingredients:
3-4 pork chops, about 1 inch thick
2 cloves of garlic, minced
1/4 cup soy sauce
2 tablespoons brown sugar
1/2 cup chicken broth
salt and pepper to taste

If you are freezing it, put all those ingredients into a freezer bag. Doesn't matter which way you put the ingredients in. Get as much air out as possible. When placing in the freezer, put it flat so you'll have more room. The instructions, which you should probably write on the bag, unless you have an awesome memory, are just as simple. Cook in crock pot on high for 4-5 hours, or low for 6-7 hours. Keep in mind, you should not put the entire bag into your crock pot. Just the contents. So after freezing, just pull the bag out before bed and put it in your refrigerator to thaw and then put it in the slow cooker the next morning. Best part? Once you put this in your freezer, it's good for 3 months. I also suggest writing the "expiration" date on the bag.


Sunday, August 12, 2012

deployment craft #2

Since I already did a craft for the kiddos, I thought I'd also do something sweet for Chris. I did some browsing around on Pinterest and found a cute little thing where she wrote letters for specific times and sent them with her husband. I used that as a sort of tutorial to do mine. 

Here's what you need:
blank cards (or cardstock to make them)
envelopes
writing utensil
decorative embellishments
twine (or yard)

You probably have everything listed just laying around your house. I went to A.C. Moore and found tiny cards that had tiny envelopes to go with them. Saved myself some time there. Instead of decorative embellishments, I used my mad drawing and coloring skills to decorate my cards. I then carefully (read: very quickly) jotted down a bunch of reasons why he might need a little pick-me-up. On the front of the envelopes I wrote "Open Me When..." and then the reason beneath. I'll list some examples below once I finish explaining the craft. Then it was on to the cards. On the front of the card, I did some doodling to go along with what "Open Me When" was on front. Inside the card, I wrote whatever I wanted to. Then I sealed the tiny card in it's matching tiny envelope. After 45 minutes or so, I had a tiny stack of tiny cards ready to be tied up. I wrapped twine around the cards and hid them in my dresser. I plan to give him the card stack as he is leaving, briefly explain what it is and let it be. I mean, if you read "Open Me When..", it's kind of self-explanatory, right? Then again, he is a man. So a brief explanation will work along with it. Lol. Swear I'm not sexist. My husband and I just have a good sense of humor. 

My hope is that he can open these cards when he needs them and they brighten his day a little. He can use these in between getting mail and care packages from everyone. Here is a small list from the top of my head of reasons I wrote on the cards. I'm too lazy to go grab the cards and write them all on here, as that would require unwinding the twine and all that.

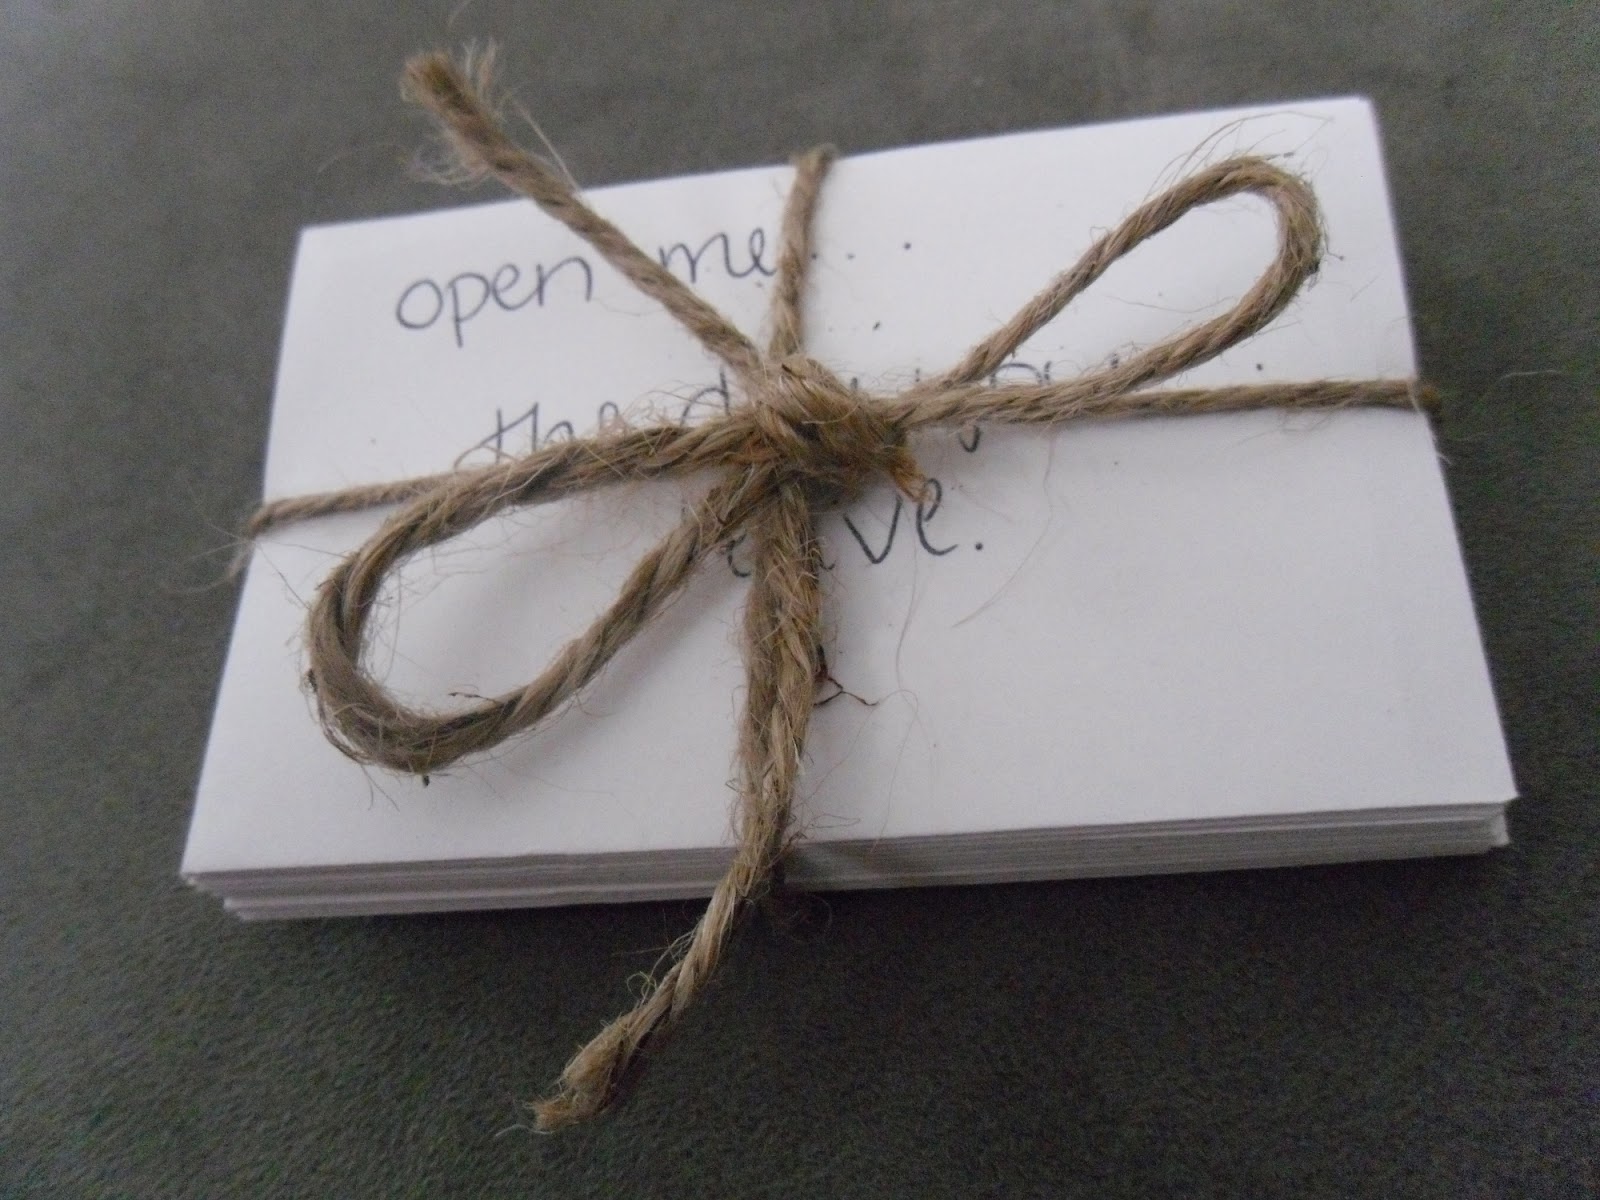
See how cute it is?!


"Open Me When"
-when you leave: Inside I wrote a little note about how we would be with him every step of the way.
-when you really want a home cooked meal: Inside I wrote about the day we refer to as 'the meatloaf incident' and how MRE's and chow can't be worse than that.
-if you get sick: Inside I put a band-aid (clever, I know) and said 'feel better'.
-when you really miss the kids: Inside I had our 2 year old draw things for him.
-when you can't sleep: Inside I wrote how I sometimes steal all of the blankets and the positive is he doesn't have to fight me for them.
-when you miss me: Inside I wrote a bunch of reasons why I love him.
-when you are on the way home: Inside I wrote how we made it and we can't wait to see him.

Those are just a few examples. I can't wait to give them to him. I know it's the little things like this (no pun intended) that will make his days easier.